Recent Posts
When you need a fire extinguisher in your home
12/28/2023 (Permalink)
When you need to extinguish a fire in your home, it's important to have the right tool for the job. And if you're like most homeowners, you probably don't know much about fire extinguishers. So, how do you choose the best one for your needs? Let's look at what makes a good home fire extinguisher, how they work and how to use them properly so that you can be prepared in case of an emergency. Keep extinguishers where you'd need them. Once you've purchased your extinguisher, consider where you would use it. In general, any room with an open flame should have a fire extinguisher nearby. You'll also want to keep one in the garage for oil and gasoline fires and in your bedroom for candles or faulty wiring. When choosing where to place your fire extinguishers, consider how far away from the source of the flames they need to be located. Most recommendations suggest keeping them within 15 feet of wherever you think they may be needed. Your best bet is probably mounting them on walls near exits so that they're easily accessible when needed, but be aware that this will require more than just drilling into drywall. If this option is not feasible—or if you want something more permanent — you could install a fire sprinkler system instead: these systems are installed above head level and spray water directly onto burning materials when activated by heat detectors inside them or through manual activation by first responders who know where they are stored in advance. Choose the right type of extinguisher for your needs. The first step in selecting the right fire extinguisher for your home is to determine what type of fire you'll need to fight. The National Fire Protection Association (NFPA), which sets standards for how fire extinguishers are constructed, recommends that homeowners purchase and use three types of extinguishers: Class A, Class B and Class C. Class A: For fires involving paper, cloth, or wood. Class B: For fires involving flammable liquids such as gasoline, paint thinner and solvents. Class C: For electrical equipment such as wiring or appliances with exposed current-carrying parts like motors and transformers. Pick the right size extinguisher. If you're using a home fire extinguisher, be sure to check the size of the extinguisher. The size of a fire extinguisher depends on the size of the room and how much water it needs to put out a fire. But if your kitchen is large with lots of cabinets and flammable materials like paper towels or plastic utensils, then you'll need a different type of fire extinguisher — one that has larger gallons of water in it so that it can put out larger fires. It's important when choosing what kind of fire extinguishers at home stores should be aware which types are available in each store before making any purchases! How to use an extinguisher properly. It's important to get training from a professional before you use your extinguisher in an emergency. You can take a class to learn how to use an extinguisher properly, or hire someone who is certified as an instructor. The National Fire Protection Association (NFPA) offers courses on how to use different types of fire extinguishers, and many fire departments offer free classes at local community centers or schools. Once you've learned how to read the label and understand the color coding, it's important not only that you know how your particular model works but also how best to handle and operate it safely and efficiently in case there ever is an emergency situation at home where this knowledge could prove vital. Check the pressure gauge, tamper seal and safety pin regularly. You should check the pressure gauge, tamper seal and safety pin regularly to ensure that your home fire extinguisher is in good working order. The pressure gauge should be in green; if it's in red, you need to change the cylinder (the container inside) as soon as possible. The tamper seal should be intact; if it's broken or missing, the contents could have been tampered with by someone other than yourself. Finally, make sure that the safety pin hasn't been removed from your home fire extinguisher; if it has been removed and replaced with another pin, then there may be something wrong with your unit! Replace old or out-of-date fire extinguishers. Once you've purchased your fire extinguisher, it's important to remember that you should replace it every 5 years. Replace an extinguisher that has been dropped or damaged in any way. Replace an extinguisher that has been exposed to heat or cold. Replace an extinguisher that has been exposed to water, oil, grease, or other chemical agents. Fire damage is scary, but if you are prepared with the right tools and know how to use them, you can avoid a lot of problems. It can cause a lot of damage and ruin your home, leaving you with a headache to deal with after the fire has been put out. But if you’re prepared for it and know how to use the right tools, you can avoid a lot of problems. Fire damage happens when there is an uncontrolled fire in your home or place of business. This can happen from a variety of sources: Cooking on an electric stovetop (or any kind of stove) Electrical malfunctions Smoking cigarettes Incandescent light bulbs You may be wondering why these types of fires are so dangerous? Well, because they burn at extreme temperatures which makes them hard to extinguish and extremely destructive if not contained properly! If you are looking to improve the safety of your home and family, a fire extinguisher is a great first step. From properly selecting an extinguisher for your needs to knowing how it works, there is much more information available than ever before. If you have any questions about what kind of home fire extinguisher will work best for your situation, contact us today!
How to prepare for an adjuster visit
12/28/2023 (Permalink)
What to Do in Advance of an Insurance Adjuster Visit
If you've suffered a loss due to fire, vandalism, or storm damage, you may be wondering what the adjuster will do when he or she arrives at your house. Here are some tips for making sure that your home is ready for an adjuster's visit.
Know What Type of Policy You Have
The first step in preparing for an adjuster's visit is knowing what type of policy you have. There are several different types and each one has its own set of benefits, so it's important to know what exactly you're covered for.
There are two main types of policies: named peril and all risk. Named peril policies cover specific incidents like fire, windstorm, or hail damage, but won't cover a loss such as theft or vandalism if those incidents aren't specifically listed on your policy. All risk policies don't list out specific incidents that are excluded from coverage; instead, they only exclude certain perils (types of losses). These perils tend to be things like earthquakes or floods — the rarest and most catastrophic kinds of losses that might be excluded from some other kinds of insurance policies.
Take an Inventory of Damages
You'll want to start your preparation by creating an inventory of damaged items. Take photos of each item or make sketches if you're more comfortable with that. If there are receipts for replacement items, keep them on hand. You may also want to keep receipts for any repairs you need to make because of the damage and deduct those costs from your claim if possible.
You should also consider keeping receipts for anything else related to the claim; this could include furniture rental while your home is being repaired, hotel nights when damage occurred during a trip away from home, cleaning services after water intrusion into your house and more.
Set Aside Damaged Property
Make sure your damaged property is in a safe place.
Keep it out of reach of children and pets.
Don't throw out anything until you know what the insurance company wants done with it.
Take Photographs of Damages and Repairs
Take photos of the damage.
Take photos of the repairs.
Keep receipts for any repairs you make and take a picture of them. Make sure to take pictures of these receipts in case there is an issue with your claims later.
Always get contact information from the contractor who made repairs to your home so that they can be contacted by an adjuster if necessary.
Gather Receipts for Emergency Home Repairs and Replacements
When an insurance adjuster arrives at your home, you'll want to be prepared with receipts if necessary. If your home was damaged by the flood, it's a good idea to keep receipts for all emergency repairs and replacements that are over $500. You may want to keep these receipts in a separate file so they're easy to find when you need them—and remember that it's better to have too many than not enough!
Make Copies of all the Paperwork You Send To Your Insurer
Make copies of all the paperwork you send to your insurer. Keeping a copy for yourself is a good idea, but it's not enough. You'll also want to keep copies for your attorney, if applicable; they might need them later if they're working with you on a case against the insurance company. Finally, make sure that there's at least one more copy of each piece of paperwork that goes out: one copy should go directly into your file, and another should be sent to the adjuster who handles claims related to this incident.
This last step is especially important when dealing with an insurance adjuster because they will likely be using this information in their investigation into whether you're eligible for compensation after an accident or injury—and they'll have access only to what you give them! Make sure there are no holes in your file so that nothing slips through the cracks during this process and ends up costing you thousands.
Get a Repair Estimate from a Contractor or Repair Person
The first thing you should do is get a repair estimate from a contractor or repair person. It's important to get an independent estimate, so don't use a friend or family member to do the repairs. It's also not advisable to use the contractor recommended by your insurance company; this tends to be more expensive because the companies have relationships with certain contractors and may benefit from recommending them over others.
Once you've gotten two estimates for all your damages, compare them side by side and make sure there aren't any discrepancies between them. You can also ask questions about anything you don't understand — for example, how long it will take for each contractor to complete their work or what materials they're using in their repairs (this can affect pricing).
The more your insurer knows about the damages, the better they can assess your claim. Be sure to have a working knowledge of your insurance policy to minimize stress in the event of a disaster.
What to do if your roof is damaged in a fire
12/28/2023 (Permalink)
What Do I Do If a Fire Damages My Roof?
A fire can cause major damage to your roof, and it's important to know what steps to take if you have experienced this kind of damage. Here are some tips.
The roof is one of the most exposed areas of your business to the elements.
It can be damaged by fire, wind and rain, snow and ice, hail, or even fallen trees after a storm.
It’s important to note that a fire-damaged roof may need repairs if it was not destroyed in the fire. Even if all that remains is charred wood or cinders from smoke damage on top of your existing roofing material (such as asphalt shingles), you may still need repairs.
A fire can cause major damage to your roof.
If your business is affected by fire, the roof is one of the most exposed areas to damage. Roofs are also built to resist a lot of weather conditions and extreme temperatures, so they can withstand a good amount of abuse before they start showing signs of wear or tear. However, fire will cause heavy damage on any type of material including steel and concrete.
The most obvious sign that your roof has been damaged by a fire is holes in it, but there are other things you need to look out for as well:
- If there's smoke damage on the outside walls or vents
- Fire residue (charcoal dust) in the ceiling
- Water or moisture stains on ceilings and walls
You should make sure you have enough tarps for the size of the roof.
To protect your roof, you should use tarps. Tarps are the best option for covering a damaged or destroyed roof after a fire. They are economical and easy to install and can be used for all sizes of roofs.
To install a tarp, you need to first measure the length and width of your roof by holding one end of your measuring tape at one corner of your house, then measuring from wall-to-wall in another direction until you reach another corner. Then add an extra foot or two onto each measurement so that when you buy tarps, they will fit snugly over all four sides of your house without any gaps between them and/or leaves a few inches overhang on each side (which helps prevent rainwater from getting into areas where there might still be standing water).
If you have experienced fire damage, call in a professional who can help you figure out what to do about your roof.
If you have experienced fire damage, call in a professional who can help you figure out what to do about your roof.
Here are some tips for using tarps:
- Make sure to have enough tarps for the size of your roof.
- Use them to keep out rain and snow.
- Use them to keep out birds, animals, and insects as well as rain and snow.
If you have experienced fire damage, call in a professional who can help you figure out what to do about your roof. Roofing companies can fix the damage and make sure that your business is safe from fire harm. They will also inspect your property for any other problems that could lead to another fire or injury at another time in the future.
How to Limit Mold Growth After a Flood
10/2/2022 (Permalink)
 Drying completely an area will allow removing moisture from the air.
How to Prevent Mold After a Flood
If there is floodwater in your home after a storm in Union, KY, it can contribute to a variety of problems. A common issue for homeowners is mold growth. It only takes a short time for this fungus to grow and spread throughout your home when it has the proper conditions. Taking the right steps can keep this growth at a minimum.
1. Remove Excess Water
Mold requires moisture to grow so water damage from a flood creates a perfect opportunity. To reduce mold growth, it is important to remove as much water from the building as you can. Once this has been done, allow everything to dry completely. Using a dehumidifier to remove moisture from the air can be helpful during this process.
2. Clean or Throw Out Damaged Property
Not only does flooding affect your house but also the items within it. Objects with hard surfaces are relatively easy to clean and can be quickly sanitized. On the other hand, porous and absorbent materials that hold water can contribute to the growth of mold if they are not thoroughly cleaned. Items that cannot be easily cleaned may need to be tossed and replaced instead.
3. Arrange For Professional Mold Removal
Because mold grows so quickly, it can be difficult to prevent it completely after a flood. A professional mold remediation company can find and remove mold that you may have missed. It is best to have this done by a professional as attempting to clean the mold on your own could spread it further throughout the house. These professionals can also treat the area to help prevent the mold from returning.
Mold growth is a common type of damage that occurs after a flood. You can limit the growth by reducing the amount of moisture in your home. If there is a mold infestation, professionals can help you remove the fungus and keep it from returning.
3 Reasons Why SERVPRO Is Faster to Any Size Disaster
9/19/2022 (Permalink)
 SERVPRO of Boone and Kenton County has all the equipment needed for any disaster
Three Reasons Why SERVPRO Is Faster to Any Size Disaster
SERVPRO is Faster to Any Size Disaster because its vast network of locally owned franchises extends across 90% of zip codes in the United States and also into parts of Canada. As a result, when disaster strikes, businesses needing restoration services don’t have to communicate with a far-off headquarters unfamiliar with the area and out of touch with their local employees. Instead, restoration professionals from a locally owned SERVPRO franchise can often arrive at a damaged property in less than two hours. Here are three reasons why SERVPRO can operate that quickly.
1. Planning for an Insurance Claim
SERVPRO offers its Emergency Ready Plan to businesses that want to have a plan for when they suffer damage from an accident or severe weather. This plan consists of completing as much insurance paperwork as possible ahead of time, allowing workers to focus on the cleanup. The plan also prepares restoration experts to deal with specific needs, including cutting off water and gas lines and other mitigation requirements unique to that property.
2. Training Disaster Mitigation Experts
SERVPRO is Faster to Any Size Disaster due to its dedicated employees. They want to be part of the team and undergo extensive training to become certified technicians. Because SERVPRO’S services are available 24/7, 365 days per year, its employees know they are on call any time of the day or night. And for their commitment, SERVPRO workers are paid well.
3. Preparing the Equipment
SERVPRO’S over1900 locations don’t waste any time when they get a call requesting their help. Some franchises prepare by packing equipment and supplies into trailers, so they’re ready to go at a moment’s notice. And, for businesses that participate in SERVPRO’S Emergency Ready Plan, their local franchise will know which disaster mitigation equipment they need for that specific situation.
SERVPRO’S commitment to excellence is why they are Faster to Any Size Disaster. Each franchise takes care of its employees so that they can make a difference in Union, KY.
How To Prevent a Natural Gas Fire
9/2/2022 (Permalink)
 Gas leaks can be identified by several recognizable signs.
How To Detect a Gas Leak
Natural gas is used to efficiently power appliances and heat many homes, but an unattended leak can lead to a gas fire. To protect your Florence, KY, home, learn how to detect a gas leak and what to do in the case of an emergency.
Noticing a Gas Leak
Gas leaks can be identified by several recognizable signs. Take caution if you detect:
- The smell of rotten eggs
- Hissing sounds coming from an appliance or pipe
- An unexplained spike in your gas bill
- Physical symptoms, such as fatigue, nausea or a headache
- Dead indoor or outdoor plants that were previously healthy
- Air bubbles in standing water or mud outside of your home
Preventing a Gas Fire
If you believe you have a gas leak in your home, check your appliances that are powered by gas to see if a stovetop or pipe is leaking. Know where your gas meter is located and how to turn it off safely if you think you have a leak. Immediately open windows and doors to ventilate your home. Do not turn on any lights or ignite any open flames, as they could spark a fire.
Calling Professionals
Contact emergency services and your gas provider to report the leak. Evacuate your home, bringing with you any pets, and distance yourself. You can wait across the street or in your vehicle parked away from the house. Wait for first responders and a representative from your gas company to arrive and deem the property safe before returning inside. In the event of a fire, call a professional restoration company to help with the rebuilding process.
Keep your home safe from a gas explosion by knowing what to do in the event of a leak. By taking the proper precautions, you can prevent a gas fire and ensure you are out of harm's way.
When Clean Water Becomes Category 2 Damage
8/30/2022 (Permalink)
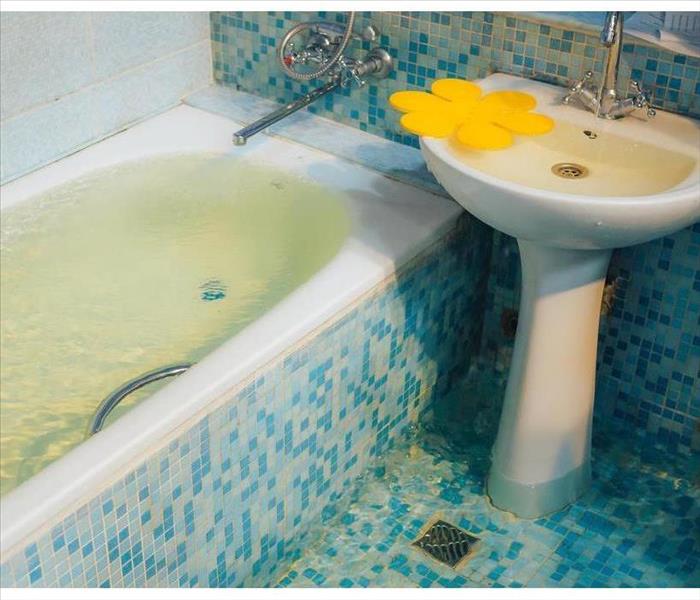 When a tub overflows you have gray water and Category 2 damage
Secondary Water Damage
A broken pipe on the second floor has flooded your building in Oakbrook, KY. You have shut off the water and completed the water pipe repair, but the flood has seeped through the floor into the apartment below. Unfortunately, that clean source water has become contaminated. You now have Category 2 water damage.
Any flood will require clean-up and repairs, but leaks and overflows involving contaminated water can result in a more extensive restoration process.
There are three categories of water damage.
Category 1 - Clean water
Category 2 - Gray water
Category 3 - Black water
What Is Category 2 Water Damage?
Category 2 water damage involves gray water, which is clear water that has been exposed to household chemicals, detergents, or biological matter. When a tub overflows or a washing machine leaks, you have gray water and Category 2 damage.
Clear water passing through building materials such as wallboard soaks up chemicals and contaminants, turning it into gray water. Water that sits around too long can become gray water as well.
How Do You Handle Category 2 Water Damage?
With any flood, the first step is to stop the source of the water. Turn off the supply and if necessary, complete any required water pipe repair. Next, you need to remove as much of the floodwater as possible to minimize the spread of damage. Then dry the affected area completely.
If the water is from a clean source and has not soaked into building materials or otherwise become contaminated, that is the end of the clean-up process. With gray water, you have the added step of removing organic or chemical residue left behind from the flood.
Water damage restoration professionals recommend performing regular maintenance on your building's plumbing. Complete routine inspections on a regular basis and perform any needed water pipe repair before calamity strikes. If you have a flood, try to prevent clean water from becoming contaminated and causing more extensive damage.
How Does FEMA Help Homeowners After Storms?
8/25/2022 (Permalink)
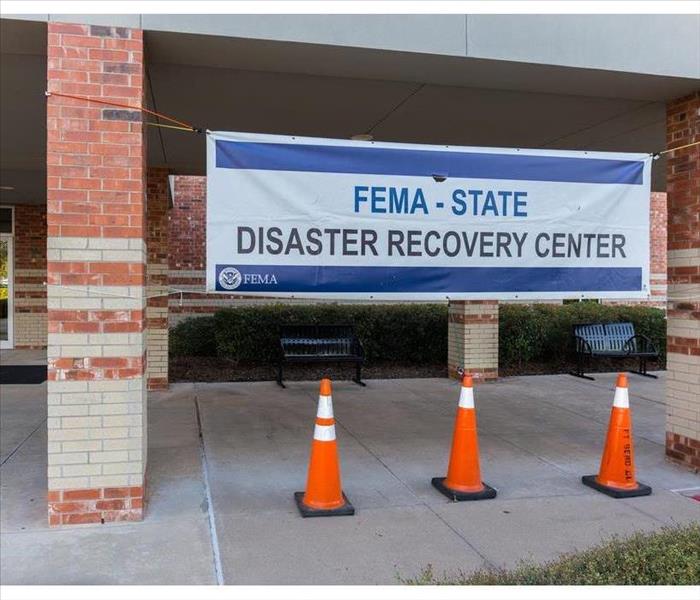 FEMA can aid you after a storm
How Does FEMA Assist Homeowners Following Storms?
After your home in Hebron, KY, has been affected by storms and flooding, it can be helpful to seek assistance. Understanding how FEMA (Federal Emergency Management Agency) can assist homeowners can be useful to you after a flood.
1. Evaluates the Home
Once your application for assistance has been received and when it is safe to do so, the agency will send someone from the organization to evaluate your home. Storms can cause a vast amount of damage to a home, and it’s important that each home is assessed on an individual basis. Homes that have sustained widespread damage may require more thorough evaluations, whereas homes that have only been minorly impacted will likely be quicker since damage can be more easily spotted.
2. Provides Documentation
In addition to evaluating the damage that has occurred to your home, FEMA also will document the damage as well. This documentation is often necessary in order for the agency to determine whether or not you qualify for financial aid. Many insurance companies require documentation after a storm has occurred, so it can also be helpful to send the information to your insurance provider.
3. Offers Compensation
In some circumstances, the agency offers financial aid to homeowners whose homes have been majorly affected by a disaster. Regardless of whether or not you do receive aid, you the organization will send you a letter explaining how the decision was made. If you have received aid, the letter will generally suggest that you spend the money on services and items that will improve the state of your home, such as emergency restoration services. Those who were denied aid, however, can make an appeal.
Knowing how FEMA can aid you after a storm can you determine what additional assistance you may require. After a storm, the agency will evaluate your home, document what has occurred and may provide you with compensation.
4 Steps To Effectively Use a Fire Extinguisher
8/2/2022 (Permalink)
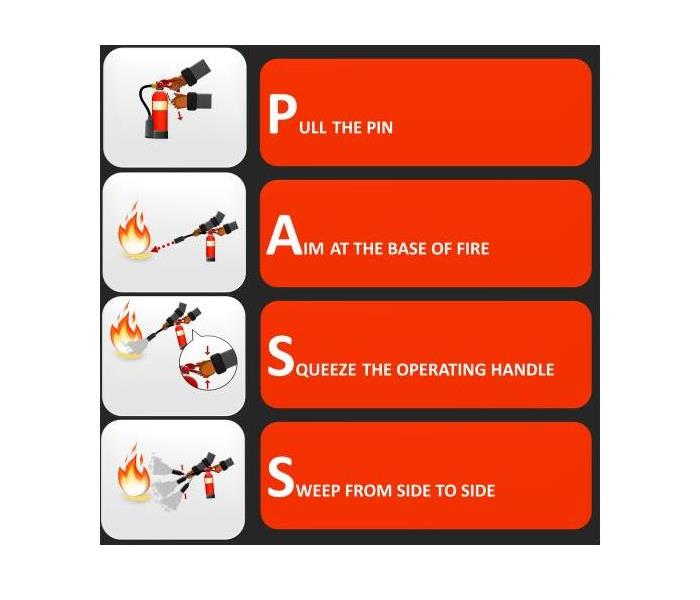 Follow these steps for using a fire extinguisher
How to Use a Fire Extinguisher
Handling a kitchen fire in Burlington, KY can be a challenge, but it's nothing you can't handle with a little training. Stay calm and follow these steps for using a fire extinguisher as directed by the U.S. Occupational Safety and Health Administration.
1. Pull the Pin
Pull the pin from the extinguisher immediately before use. Do not remove the pin in advance of any fires or you risk accidentally spraying the contents should you knock the canister over or move it for any reason. Pulling the pin will also break the tamper seal.
2. Aim the Fire Extinguisher
Aim the nozzle or hose at the point where the flames originate (at the base of the fire). Do not aim at the middle or top of the flames, as this will not properly extinguish the fire. Be careful not to touch the discharge nozzle or hose as the carbon dioxide is extremely cold and can damage your skin.
3. Squeeze the Handle
Squeeze the handle firmly to release the fire-stopping chemicals from the canister. Maintain firm, even pressure, and do not pump the handle in bursts like a gun trigger. Remember to keep your skin away from the cold chemicals being released.
4. Sweep the Area
Sweep the nozzle from side to side, maintaining aim at the base of the fire. Continue to spray in this manner until the fire appears to be out. At that point, release the handle and observe the area. If the fire re-ignites or if smoke increases in volume, repeat steps two through four.
If the fire continues to grow even as you attempt to extinguish it (and especially if it begins to intensify after the fire extinguisher has been emptied), vacate the property immediately and call the fire department for assistance. Once the smoke clears, you can begin a claim with your insurer and start working with a fire restoration company.
Stay calm and follow these steps to extinguish the fire quickly and minimize fire damage.
What Items Should You Throw Away After a Fire?
7/23/2022 (Permalink)
 The high heat that accompanies a fire could affect your medications.
Throw Away These Belongings After a Fire
The large flames and billowing smoke that accompany a fire can be quite destructive. Fire damage restoration professionals in Hebron, KY, can salvage many items in your house. However, they will not be able to save everything. Certain items will have to be discarded for your safety.
1. Burned Clothes
Remediation experts can disinfect and clean beddings and clothes following a fire. However, charred textiles should be tossed in the trash. The chemicals in the soot and smoke could irritate your skin the next time you try to wear those clothes. You could also inadvertently inhale those chemicals.
2. Medicines
The high heat that accompanies a fire could affect your medications. Their potencies could be altered, which could harm you if you ingest the medicines. Soot, smoke and fire-dousing chemicals may damage medicines, as well. You should thus throw away those pill bottles and ask your doctor for refills.
3. Cosmetics
Excessive heat and fire suppressants could also alter the minerals and chemicals inside toiletries and cosmetics. It may be tempting to clean and keep these items, especially since they can be expensive. However, fire-damaged makeup or shampoo could harm your hair and skin.
4. Food
Food can easily get contaminated by chemicals from fire extinguishers. Heat from a blaze could also activate harmful bacteria lingering in jars and cans. Any foods that have fire extinguisher dust should be thrown out, as should any cans that are rusted or bulging.
Any perishable items left in a freezer or refrigerator that lost power should also be tossed. If you can afford to do so, you should consider replacing all food affected by the blaze.
To keep yourself and your family safe, you should throw away burned clothes after a fire. You should also discard any cosmetics, medicines and foods that were damaged by the flames and smoke. However, many of your other belongings can be restored with the help of remediation professionals.
 24/7 Emergency Service